Phil is working away on the “Oop Tree” on the Pico, but is getting into “slow progress” with getting to grips with the implementation of how the tree will be affected by various inputs (water, food, light).
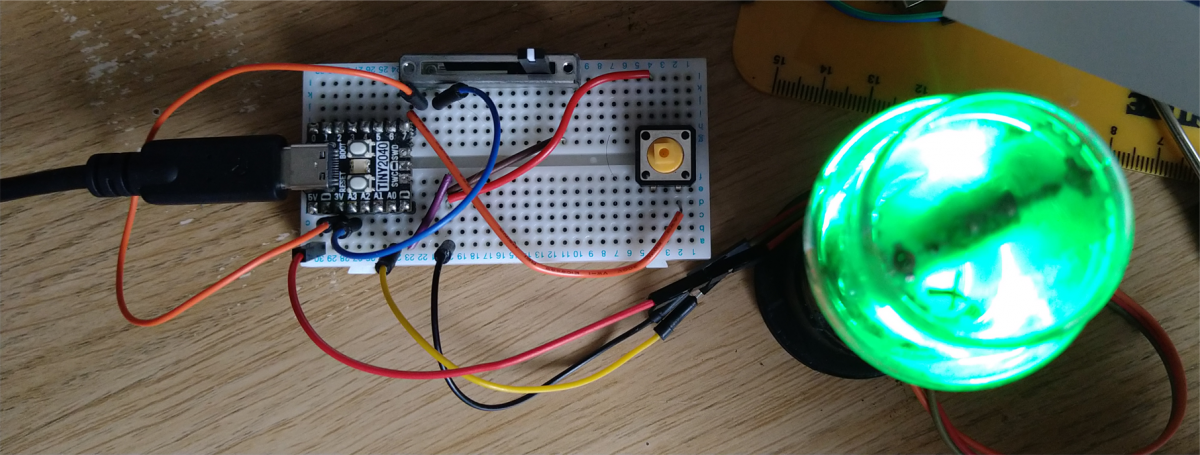
So as a “quick show n tell” – he’s put together a quick project using a #pimoroni #tiny2040 microcontroller, again, running the latest version of #circuitPython. Having found a box of old blown Valves (Beautiful objects!) Phil thought he would try to convert them into a useful light, using an RGB led, a button and a sliding potentiometer.
Phil did wire up a classic 4 legged RGB led & got it working, but had some very neat, single “NeoPixels” from Ada Fruit lying around, so soldered some pins onto one & used that, as instead of needing 3 separate pins to control the Red Green & Blue pins, you can do that all through one pin on the NeoPixel. There’s even a handy library to help ease the controls of changing the light colours / intensity.
First, Phil wired the push button into a digital pin (GP7) + Ground, then added a sliding potentiometer (you need 3 connections for this input, a constant 3v, a ground connection, then your “reading” (analogue) connection (A3)). Lastly, phil connected the 3 wires (5v, Gnd + A0) to the NeoPixel. Because you can “chain” NeoPixels, be sure to use the “in” side of the NeoPixel. Phil then drilled a hole into the base of the old Valve, he did this outside (well ventilated) and wore a mask, just in case there are any nasty old chemicals inside the housing or valve itself.
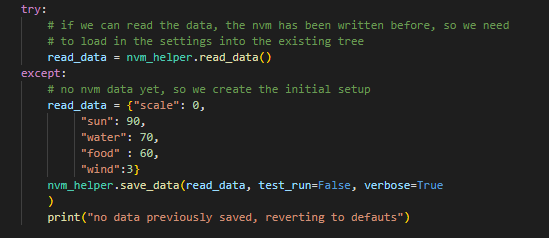
The full code for Phil’s RGB Led can be found here and a wee explanation below:
This project uses a single pushbutton to “cycle through” different states the NeoPixel uses. There is a Dictionary (Dict) that keeps information for LED levels (a “Base” RGB colour + “mix” (potential new levels to be added to the base colour). Each Dict Key is a string that should make the values obvious! The last setting is to make the slider decide what colour the RGB led should be…
Using a few functions Phil wrote for previous projects, you can now pass two tuples (r,g,b) and add them together to return the “mixed” (r,g,b) value – and apply it to the NeoPixel with the simple library method “pixels[0] = (r,g,b)” and “pixels.show()” (to update the NeoPixel).
The slider affects the possible “maximum mix” value by first converting its raw value (130 to 65000+) to 0 & what ever the current maximum value is for that “mix” (stored in the dictionary) this is done for each value (r, g, b). So when the slider is at “0” the maximum possible random number is between 0 & 0 (no new colour added to the base colour!) the higher the slider goes, the more randomness for each Red, Green, Blue “mix” value is possible… so the light starts to flicker within the range of the “base + mix” values…
The Slide setting uses a “wheel” method from Ada Fruit, and we “just” need to map the slide value (again from 130 to 65000+) to 0 & 255. When the slider is moved, it takes its position & passes an RGB value to the Neopixel to cycle from Green to Green over the spectrum. Nice.